International Baccalaureate · PYP 2
Maps, Grids and Directions
I
The Plan of the School and the Neighbourhood
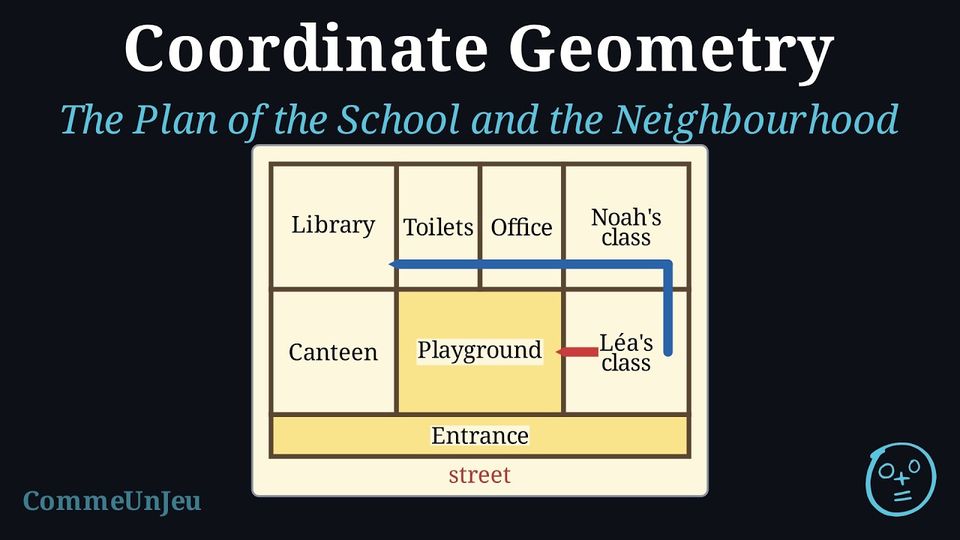
Léa's cousin is coming to her school tomorrow. Léa wants to explain to her, on a sheet of paper, where her classroom is: “it is near the playground, far from the library”. How can Léa draw the whole school on one sheet?
Like the plan of the bedroom and the plan of the classroom: she draws the school seen from above. Each room becomes a rectangle, the playground a big rectangle, and she writes the name inside. She places the fixed landmarks first — the entrance, the playground, the canteen — then her classroom beside them. 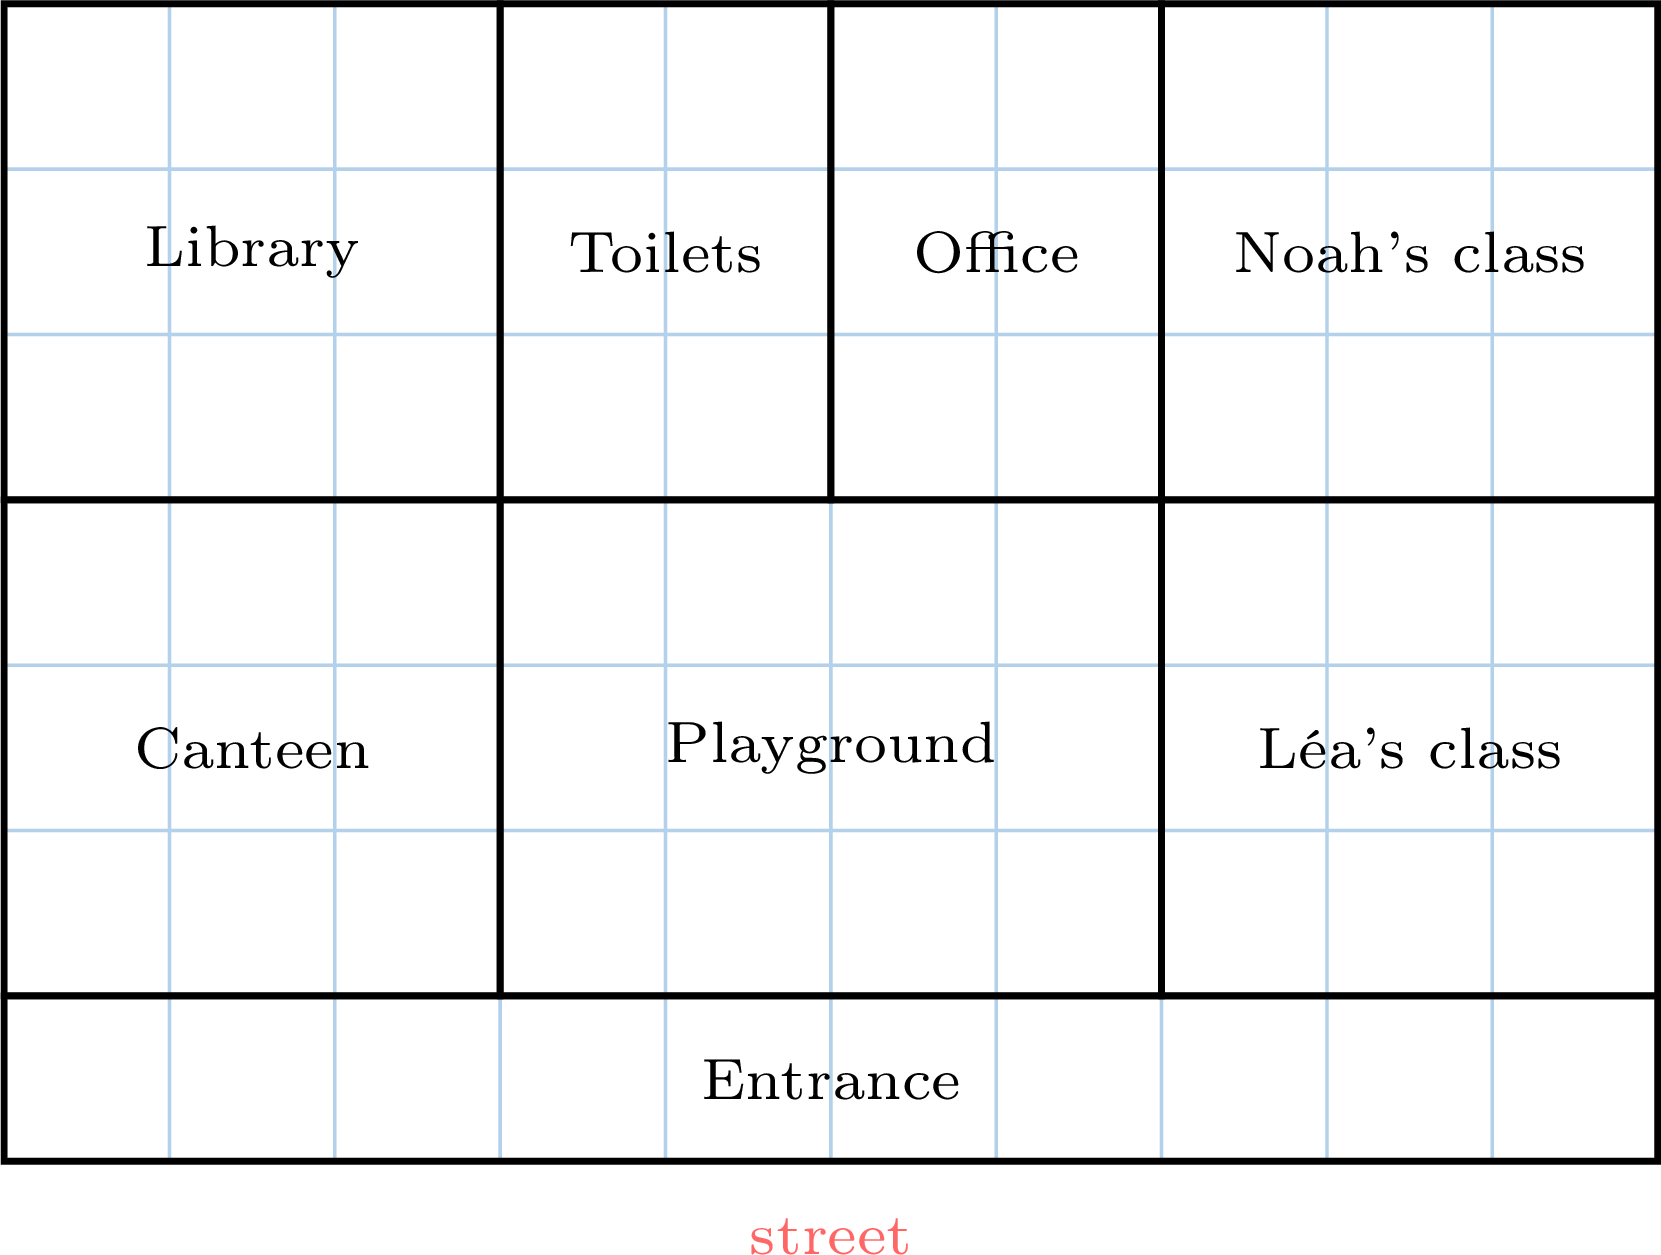
Definition — Near and Far
Two words compare distances. A place is near when the route to it is short, a few steps: Léa's class is near the playground. A place is far when the route to it is long, across the school: the library is far from Léa's class. 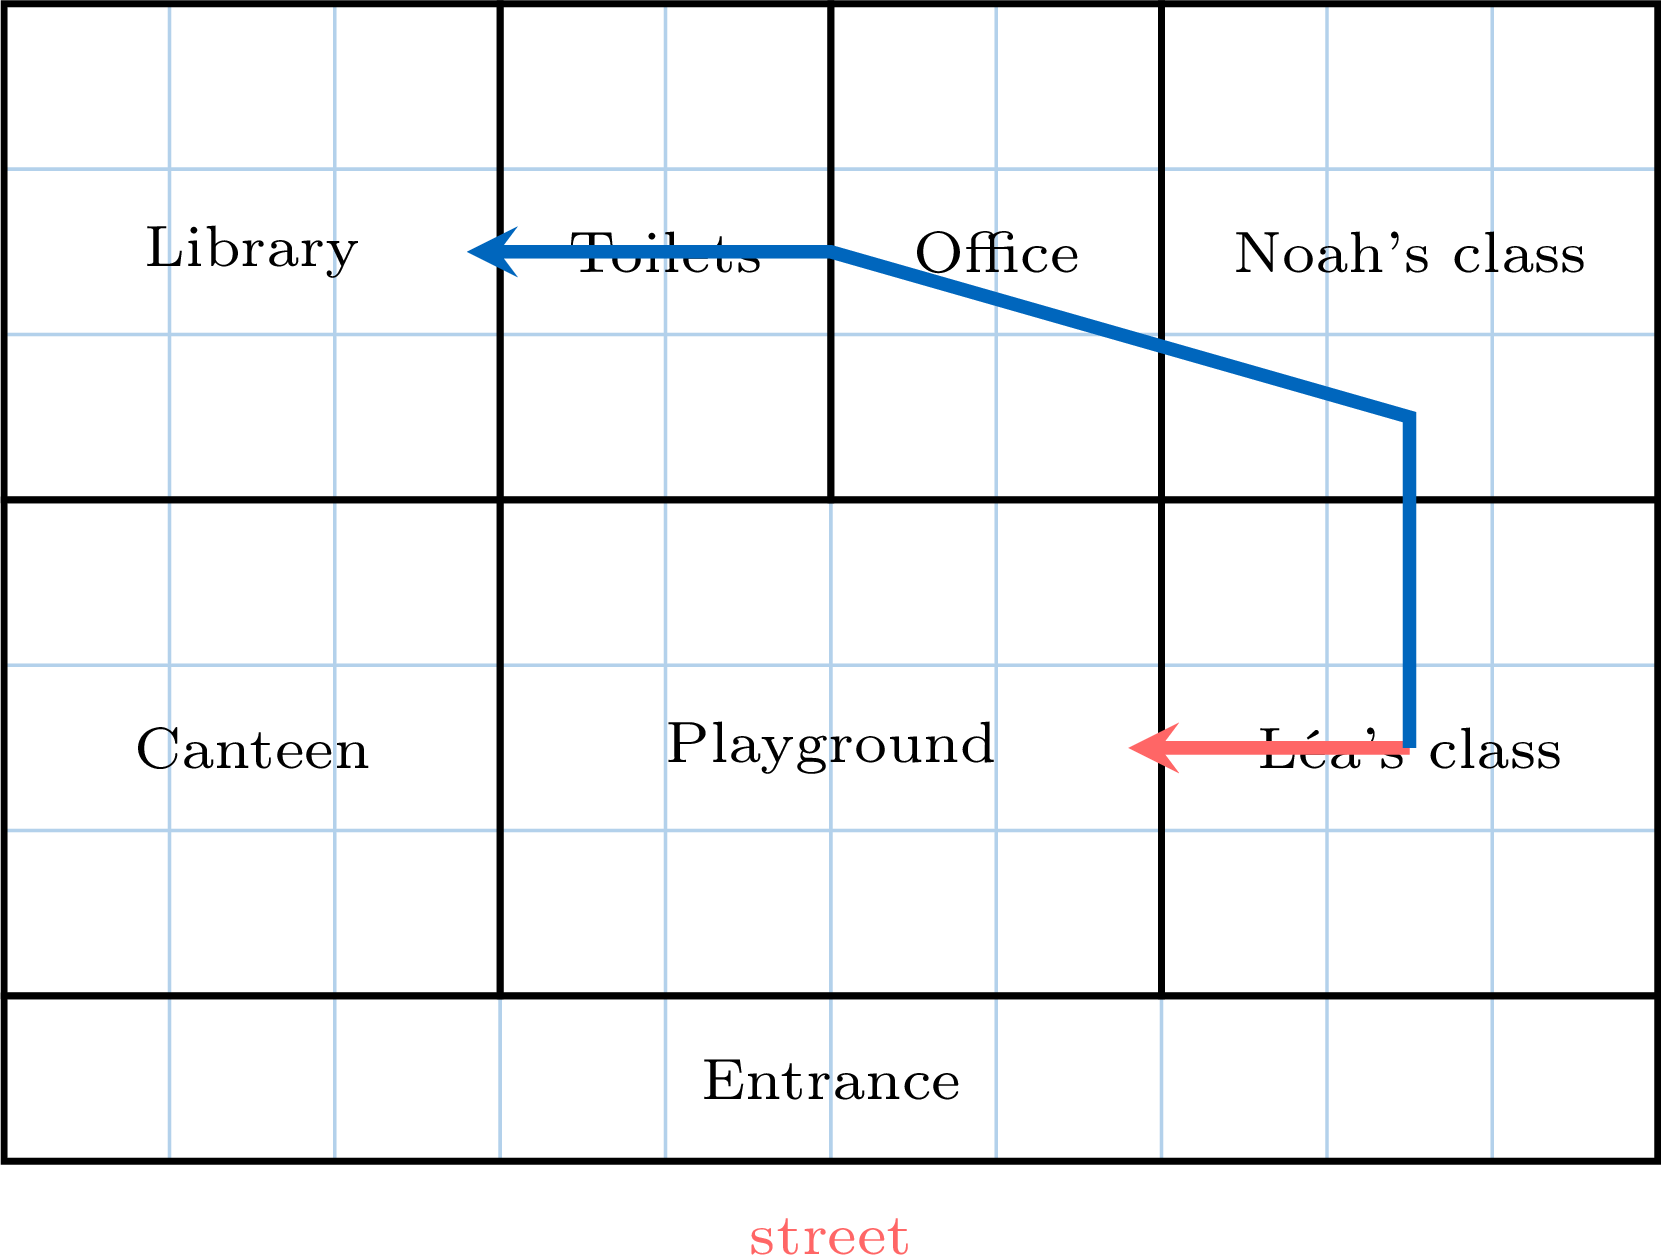
Definition — The Plan of the School
The plan of the school is the drawing of the school seen from above. Each room is a rectangle with its name inside; the playground and the entrance are the fixed landmarks, the ones everybody knows. On the plan we can point at a room, say where it is compared to the others — “the office is between the toilets and Noah's class” — and follow a route with the finger. Method — Making a Plan
- Place the fixed landmarks first: the entrance at the bottom of the sheet, for example, then the playground in the middle — big and easy to find.
- Place each room compared to them: to the left of the playground, above the canteen, next to the entrance…\ one rectangle each, its name inside.
- Check by walking: walk through the school with the plan in hand, finger on the plan — every door you pass must be at its place on the drawing.
The Aerial Photo
A photo taken from the sky — from a plane or a satellite — shows the neighbourhood seen from above, like a real plan: the roofs, the streets, the playground of the school. On such a photo, or on the plan of the town, we can find the places we know — the school, the town hall, the bakery, the swimming pool — and draw the route we walked. 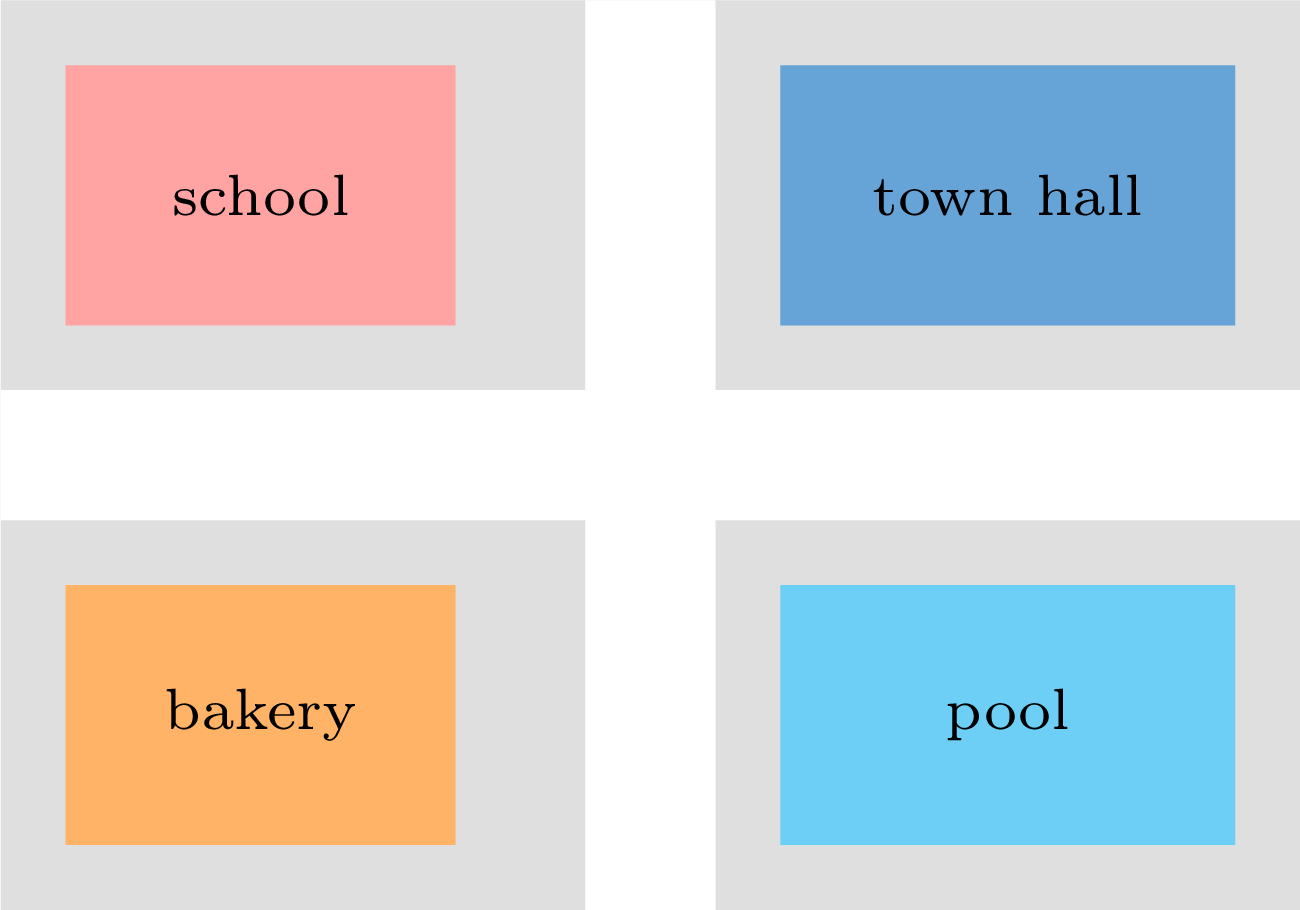
Example
On the plan of the school, Léa goes from her class to the canteen without crossing the playground: she walks along the entrance corridor. 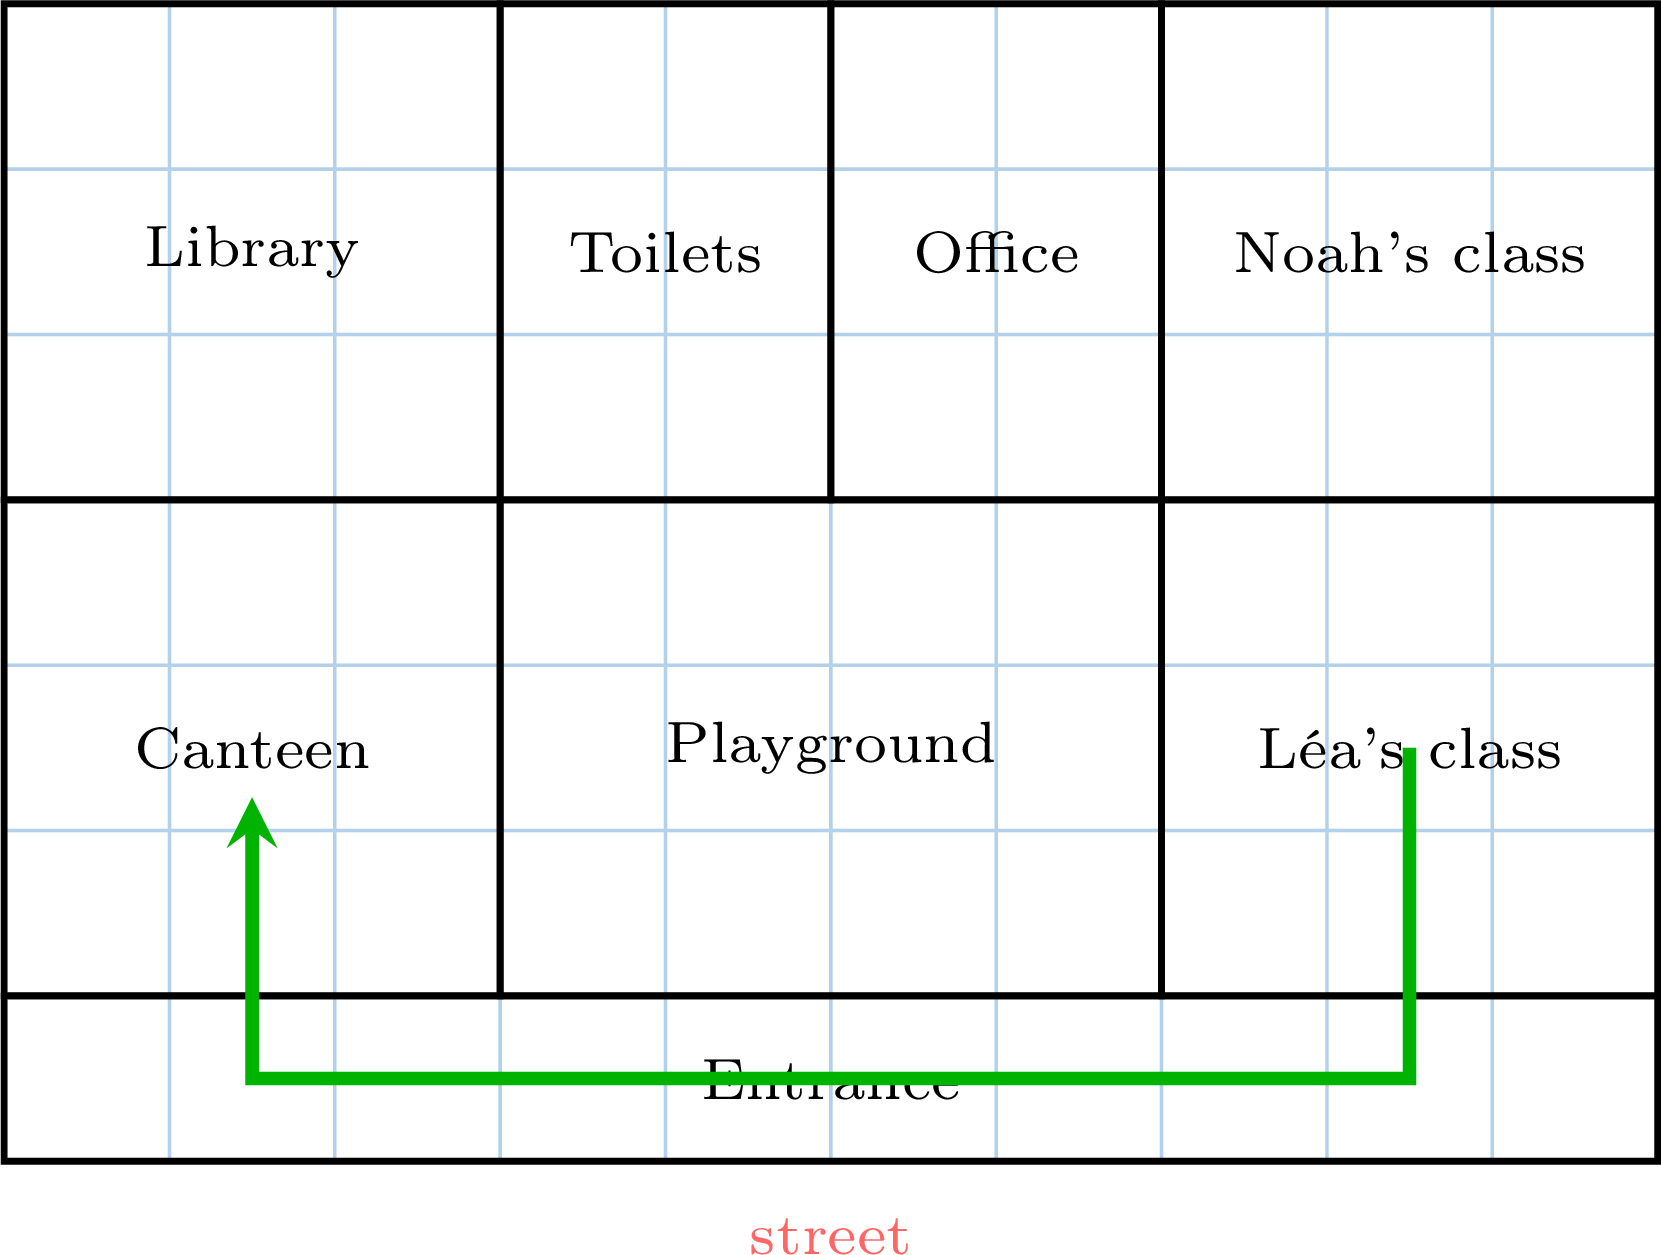
Skills to practice
- Reading the Plan of the School
- Reading the Plan of the Neighbourhood
- Producing a Plan
II
The Map
Definition — Map
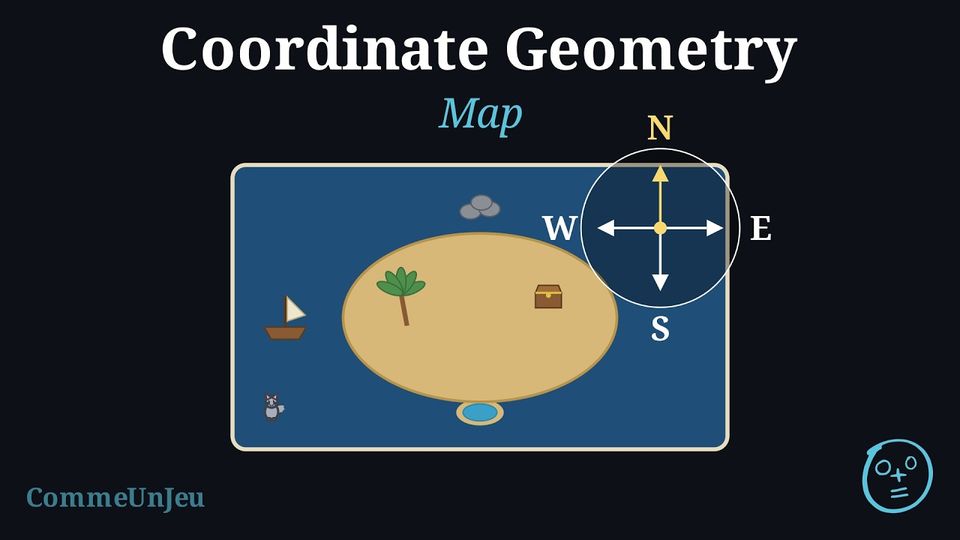
A map is a drawing that shows a place from above, like a park or a treasure island. It helps us see where things are, like trees, paths, or a treasure chest.
Example
This treasure map shows where things are: the ship is on the sea, and the chest is on the island. 
Skills to practice
- Finding Directions on the Treasure Map
III
The Grid
Definition — Grid
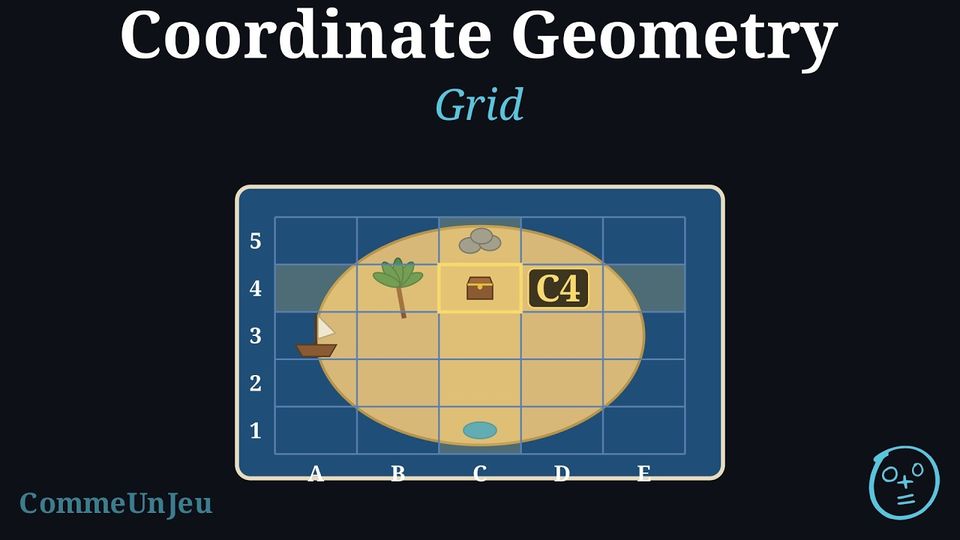
On a map, a grid helps us find where things are. Each square on the grid has a name made of a letter and a number.
- The letter tells us the column. We read the letters along the top or the bottom of the grid (from left to right).
- The number tells us the row. We read the numbers up the side of the grid (from bottom to top).
Example

Skills to practice
- Finding Squares on a Grid and on a Map
IV
Programming the Robot
The class robot sits on its squared mat, its nose towards the top. Noah says: “go to the right!” — the robot does not move. Sami says: “make a quarter turn to the right, then move forward 2” — the robot turns, then moves forward two squares towards the right. 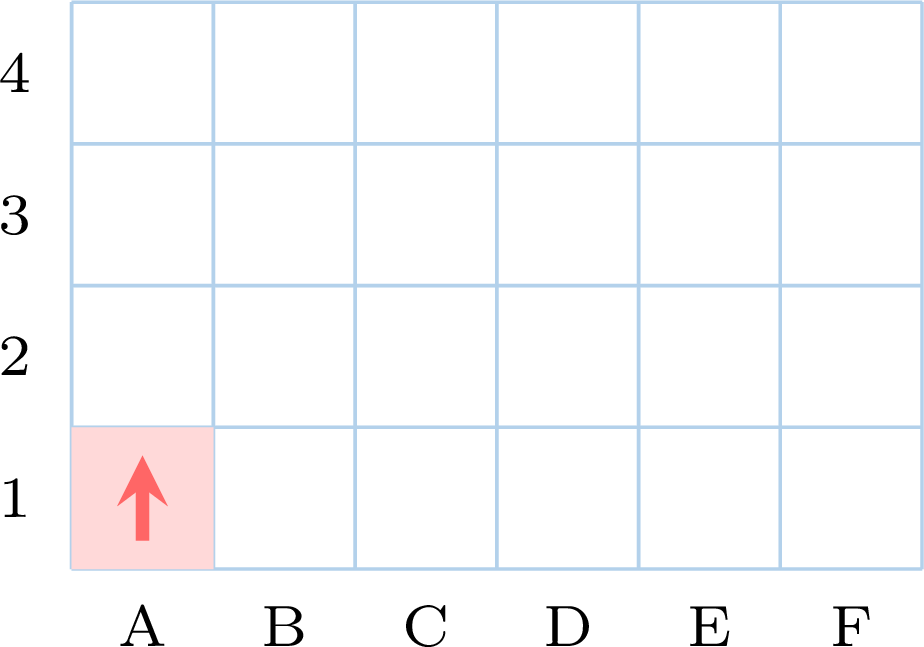
Why did the robot not understand Noah?
The robot only knows three instructions: move forward a number of squares, make a quarter turn to the right, make a quarter turn to the left. “Go to the right” is not one of them. To send it to the right of the mat, Noah must say what the robot does: first turn, if needed, so that its nose looks that way — then move forward.
Definition — The Robot's Instructions
The robot obeys three instructions: - move forward \(2\) (\(3\), \(4\)…): it goes that many squares in the direction of its nose;
- make a quarter turn to the right: it turns on its square, its nose now looks towards its right;
- make a quarter turn to the left: the same, towards its left.
Method — Following a Program
- Start: put your finger on the robot's square and look where its nose points.
- One instruction at a time: “move forward \(2\)” — count \(2\) squares in front of the nose and draw the path; “turn” — put yourself in the robot's place and turn its nose a quarter turn, without moving the finger.
- Tick each instruction once it is done, so as not to skip one.
- Arrival: circle the square where the finger stops.
Method — Writing a Program
- Draw the path on the grid, square by square, from the robot to the goal.
- Cut it into straight pieces: each straight piece is one “move forward” followed by the number of squares.
- Before the first piece: if the robot's nose is not looking along the first piece, first write the quarter turn (or the two) that brings it there.
- Between two pieces, a turn: put yourself in the robot's place — does its nose turn to its right or to its left? Write the matching quarter turn.
- Check: give your program to a classmate; following it, they must arrive exactly on the goal.
Example
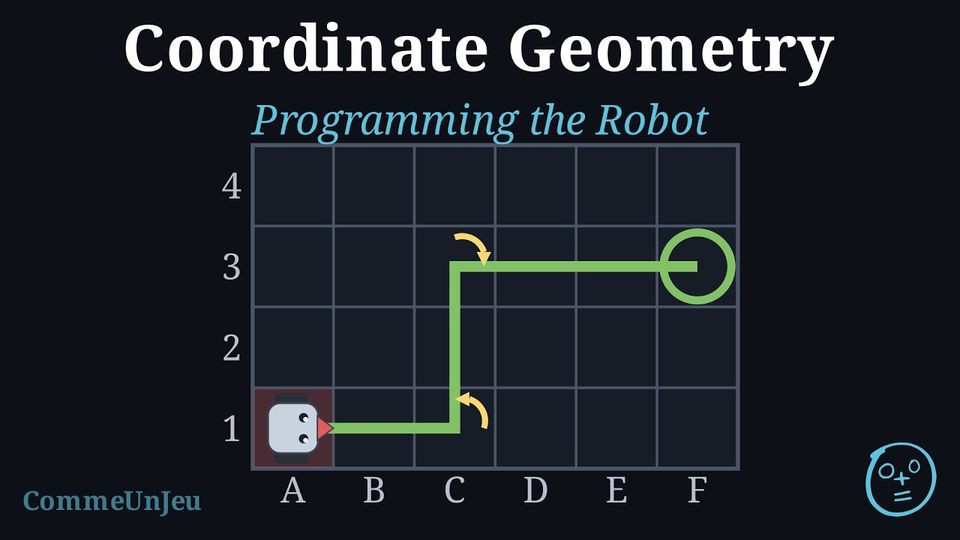
The robot is in square A1, its nose towards the right. It gets this program: - move forward 2
- make a quarter turn to the left
- move forward 2
- make a quarter turn to the right
- move forward 3
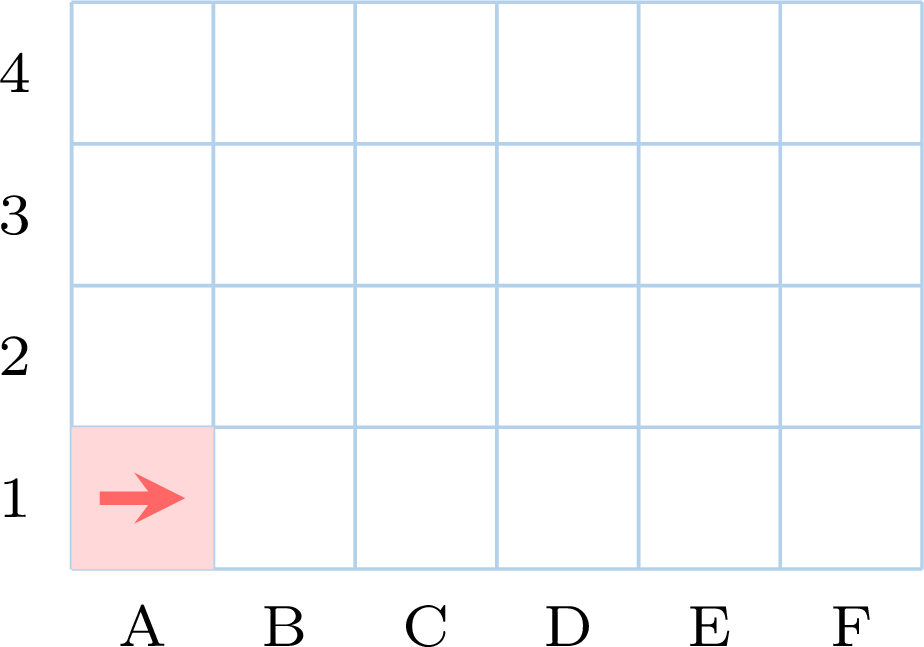
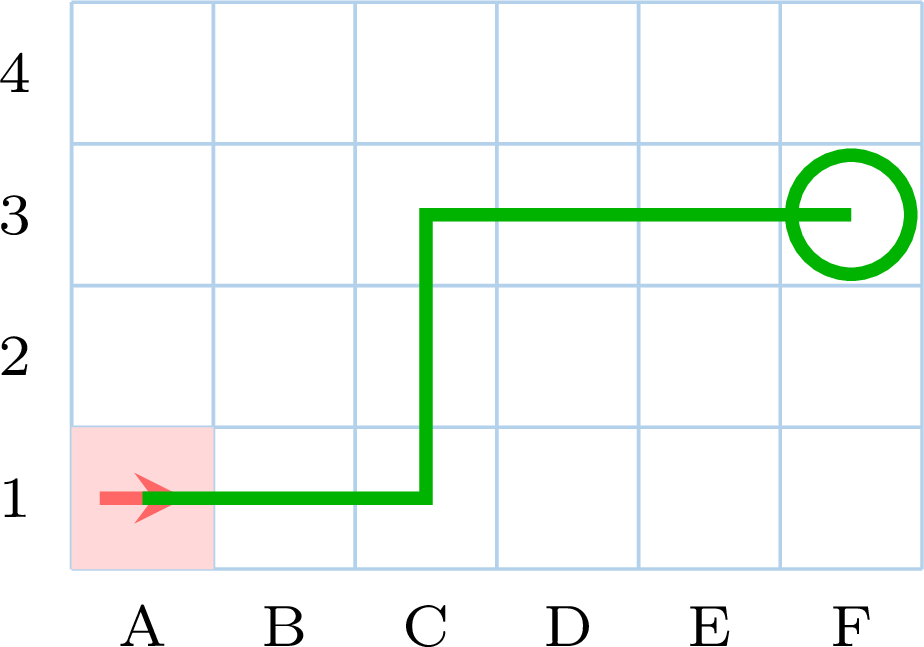
Skills to practice
- Driving and Turning: the Car's Final Position
- Following a Program
- Writing a Program
V
Going further
Skills to practice
- Writing Squares on the Grid
- Following a Program around an Obstacle
- Solving Plan and Grid Problems
- Solving Robot Problems
- Quiz
Jump to section